Introduction
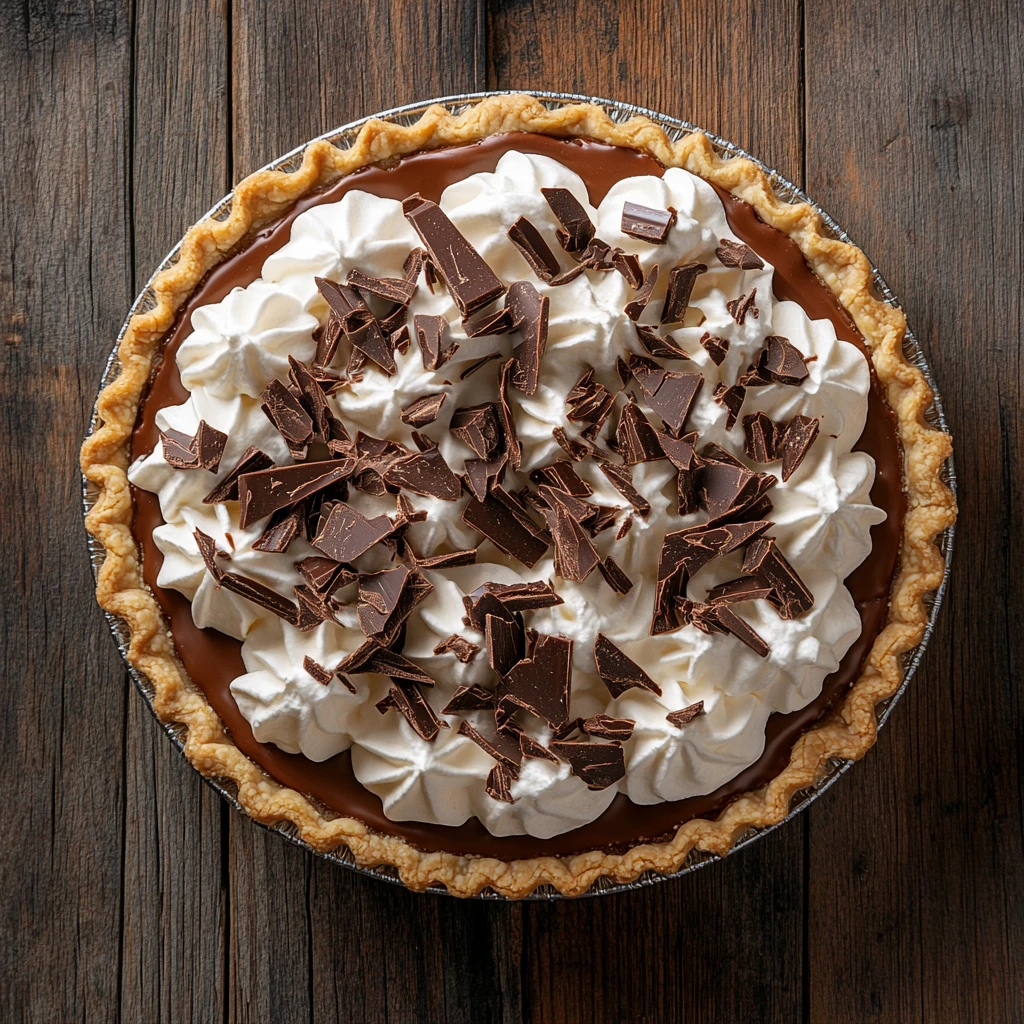
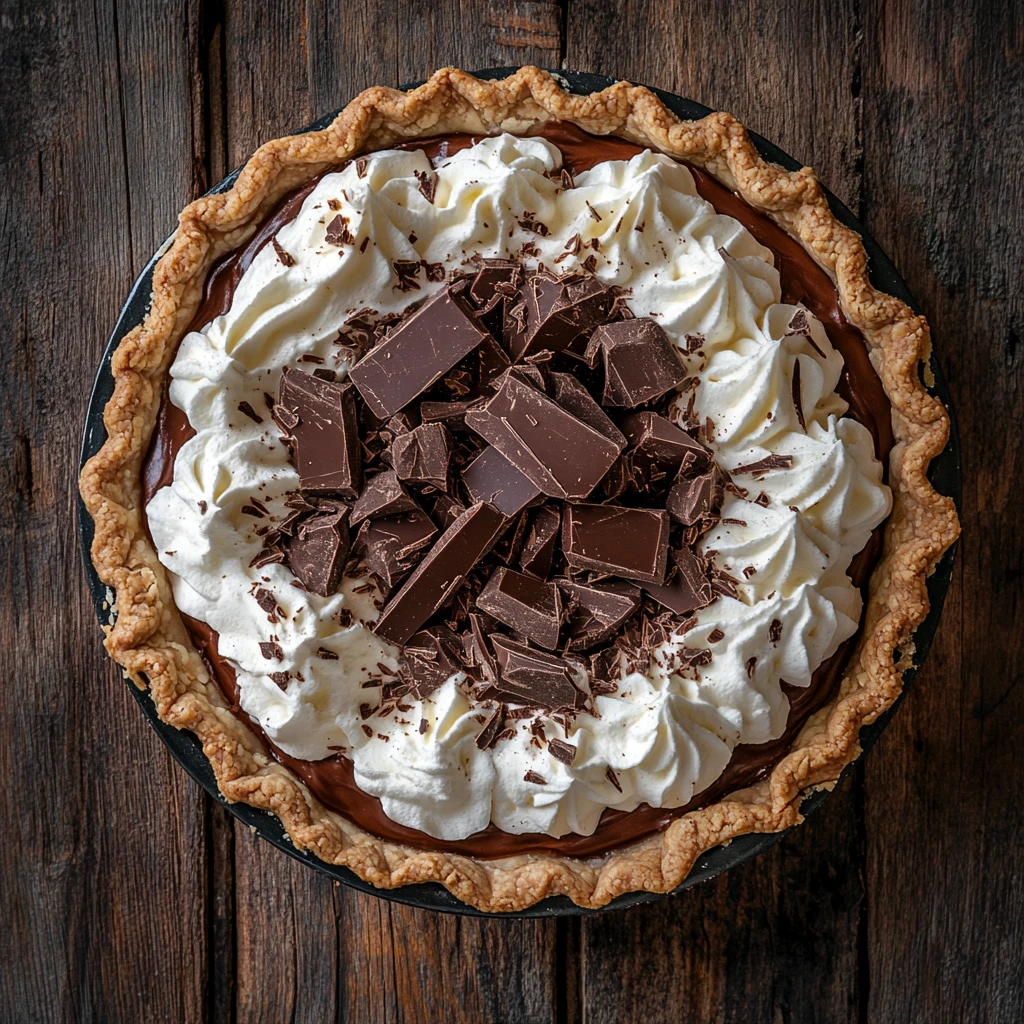
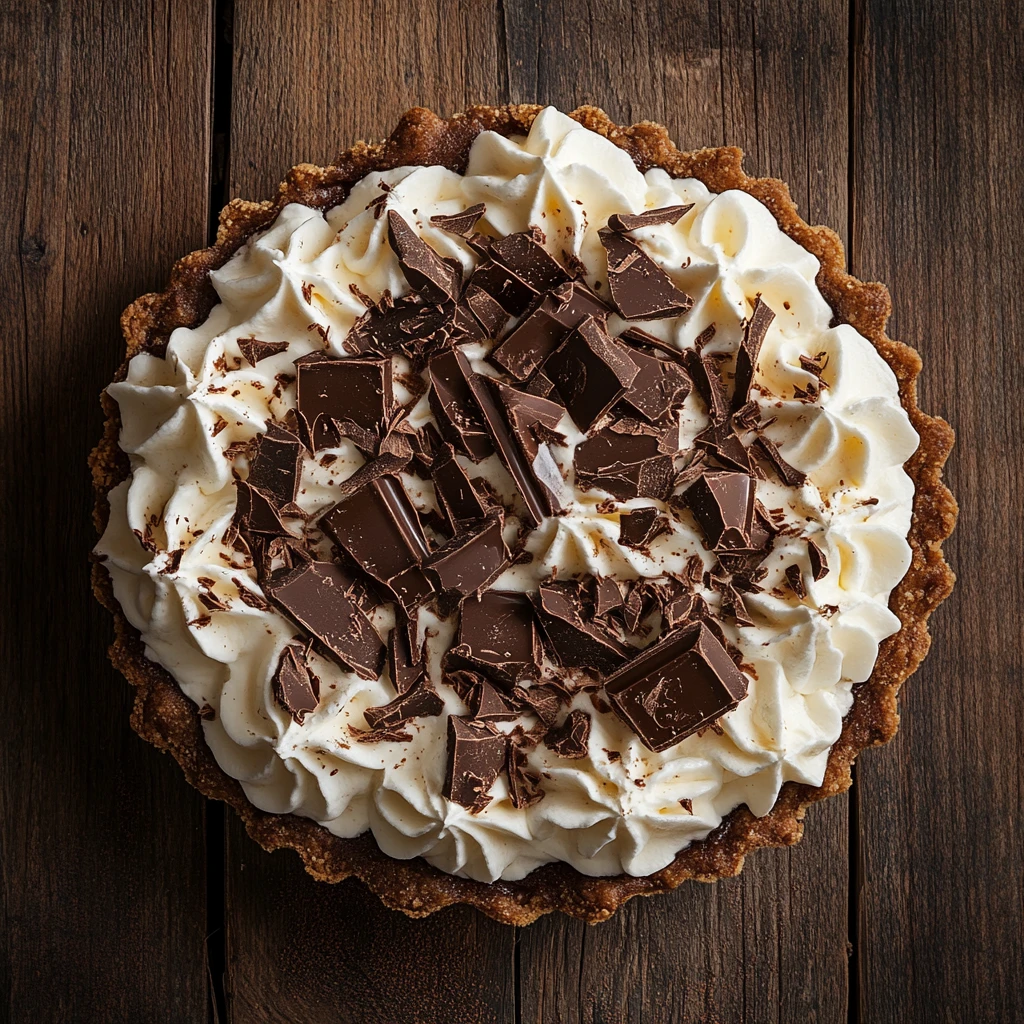
Hey there, chocolate lovers! Today, I’m excited to share with you a delightful recipe for an Easy Chocolate Cream Pie that never fails to impress. Picture this: a luscious, velvety chocolate filling nestled in a flaky pie crust, topped with a cloud of whipped cream. It’s a dessert that always brings smiles to the faces of my family and friends.
Every time I whip up this Chocolate Cream Pie, it takes me back to my childhood when baking with my grandma was a cherished tradition. The aroma of chocolate wafting through the kitchen, the anticipation of that first heavenly bite – it’s pure magic!
What makes this recipe so special is its simplicity. No need to be a pastry chef to nail this one; it’s foolproof and oh-so-satisfying. So, without further ado, let’s dive into the world of decadent chocolate goodness!
Why You’ll Love This
Now, let me tell you why this Easy Chocolate Cream Pie has a special place in my heart. I make this when I need a pick-me-up on a gloomy day, or when I want to impress guests without breaking a sweat. My family goes crazy for this because, well, who can resist a perfect blend of rich chocolate and creamy goodness?
Oh, and if you’re like me and enjoy sneaking a taste while preparing a dessert, this recipe offers the perfect opportunity (wink, wink). Don’t worry if the filling looks a bit runny at first – it sets beautifully in the fridge!
And let’s be real – who doesn’t love a dessert that’s as easy to make as it is to devour? This Chocolate Cream Pie ticks all the boxes for a hassle-free, crowd-pleasing treat.
(Psst… I may or may not have had a tiny kitchen mishap the first time I made this – let’s just say, chocolate can be quite the messy ingredient!)
Ingredients
For this delectable Chocolate Cream Pie, you’ll need: your favorite pie crust (homemade or store-bought), semi-sweet chocolate chips, heavy cream, sugar, vanilla extract, and a pinch of salt. I sometimes use dark chocolate for a more intense flavor, but feel free to experiment with different chocolate varieties!
Optional substitutions? Sure thing! I sometimes swap the heavy cream for coconut cream for a dairy-free version, and it works like a charm. My grandma always insisted on using a particular brand of chocolate, but trust me, any good-quality chocolate will do the trick.
Remember, baking is all about creativity, so don’t be afraid to make this recipe your own!
(And if you’re a chocolate lover like me, you might find yourself sneaking a handful of chocolate chips while preparing the filling – guilty as charged!)
Directions
Now, onto the fun part – assembling this heavenly Chocolate Cream Pie! Start by pre-baking your pie crust until it’s golden and crisp. While it cools, melt the chocolate with a splash of cream, stirring until smooth and glossy. This is where I usually sneak a taste – quality control, right?
Next, whip up the remaining cream with sugar and vanilla until soft peaks form, then fold in the luscious chocolate mixture. Pour this velvety goodness into your cooled crust and chill for a few hours (or overnight if you can resist the temptation!).
Don’t fret if your pie doesn’t look picture-perfect – the taste more than makes up for any imperfections. And trust me, the sight of that first slice being lifted out is pure bliss!
(Confession time: I’ve definitely cut myself a larger slice than intended because, well, who can resist more of this indulgent treat?)
Notes
Through trial and error, I’ve discovered that letting the pie chill for at least 4 hours yields the best texture – it’s worth the wait, I promise! If you’re in a hurry, pop it in the freezer for a quick set, but keep an eye on it to avoid freezing solid.
One little trick I’ve learned is to sprinkle some chocolate shavings or cocoa powder on top before serving – it adds a touch of elegance and extra chocolatey goodness!
(And if you happen to have leftovers – which, let’s be honest, seldom happens in my household – a quick zap in the microwave can revive the pie to its former glory!)
Variations
As an adventurous baker, I’ve tried a few variations on this Chocolate Cream Pie. One experiment that didn’t quite work out was adding a fruity layer between the crust and chocolate filling – the flavors clashed, and it wasn’t the harmonious dessert I was aiming for.
However, I did stumble upon a successful twist by incorporating a hint of espresso into the chocolate for a mocha-infused delight. It’s amazing how a small change can elevate a classic recipe!
Remember, baking is all about exploration, so don’t be afraid to get creative and share your own flavor discoveries!
(Oh, and if you’re feeling daring, a sprinkle of sea salt on top can take this pie to a whole new level of decadence!)
Equipment
If you don’t have a pie dish on hand, fret not! A springform pan or even a tart pan can work just as well for this recipe. Improvisation in the kitchen is half the fun, right?
(Personally, I’ve had my fair share of kitchen tool mishaps – like the time I tried to whisk cream by hand and ended up with a not-so-fluffy mess. Lesson learned: invest in a good electric whisk!)
Storage Information
Though honestly, in my house, this Chocolate Cream Pie never lasts more than a day! But if you’re more disciplined than I am, it can be stored in the fridge, covered, for up to three days. Just be warned – it may mysteriously disappear before then!
(True story: I once hid a slice in the back of the fridge, only to discover it miraculously vanished overnight – turns out, my sneaky sibling has a sweet tooth too!)
Serving Suggestions
When it comes to serving this Chocolate Cream Pie, I have a simple rule: the bigger the dollop of whipped cream on top, the better! It’s all about that perfect balance of creamy, chocolaty, and airy goodness in every bite.
Personally, I find that a piping hot cup of coffee pairs beautifully with a slice of this pie – the bitter notes of coffee complement the sweetness of the dessert perfectly. But hey, everyone has their own favorite pairing!
(And if you’re feeling extra indulgent, a scoop of vanilla ice cream alongside the pie takes it to dessert heaven – trust me on this one!)
Pro Tips
Through my baking adventures, I’ve learned a thing or two about perfecting this Chocolate Cream Pie. I once tried rushing the chilling step and regretted it because the filling didn’t set properly – patience is key in the world of baking!
Another valuable lesson I’ve learned is to always use room temperature ingredients when making the filling. It ensures a smooth, lump-free texture that’s essential for the ultimate chocolatey experience.
(And if you find yourself with a cracked pie crust – don’t panic! A generous dollop of whipped cream can hide a multitude of baking sins!)
FAQ
Q: Can I use milk chocolate instead of semi-sweet for this pie?
A: Absolutely! Milk chocolate will give your pie a sweeter profile, so adjust the sugar in the filling accordingly. Remember, baking is all about tailoring recipes to your taste!
Q: What if I don’t have a mixer to whip the cream?
A: No mixer, no problem! A good old-fashioned whisk and some elbow grease will do the trick – just be prepared for a mini arm workout!
Q: Can I freeze this pie for later?
A: While it’s best enjoyed fresh, you can freeze this pie for up to a month. Just make sure to thaw it in the fridge overnight for the best texture.
(And remember, there are no silly questions when it comes to baking – we’ve all been there with a kitchen conundrum or two!)
So there you have it – a delightful journey into the world of Easy Chocolate Cream Pie. I hope this recipe brings as much joy to your kitchen as it does to mine. Happy baking and even happier indulging!
Easy Chocolate Cream Pie
Indulge in the decadent bliss of a velvety chocolate filling nestled in a flaky pie crust, topped with a cloud of whipped cream with this easy and foolproof Chocolate Cream Pie recipe.
Ingredients
-
1 pie crust (homemade or store-bought)
-
1 1/2 cups semi-sweet chocolate chips
-
2 cups heavy cream
-
1/2 cup sugar
-
1 teaspoon vanilla extract
-
Pinch of salt
Directions
-
Pre-bake the pie crust until golden and crisp.
-
Melt the chocolate with a splash of cream until smooth.
-
Whip the remaining cream with sugar and vanilla until soft peaks form.
-
Fold the chocolate mixture into the whipped cream.
-
Pour the mixture into the cooled crust and chill for a few hours or overnight.
-
Sprinkle with chocolate shavings or cocoa powder before serving.