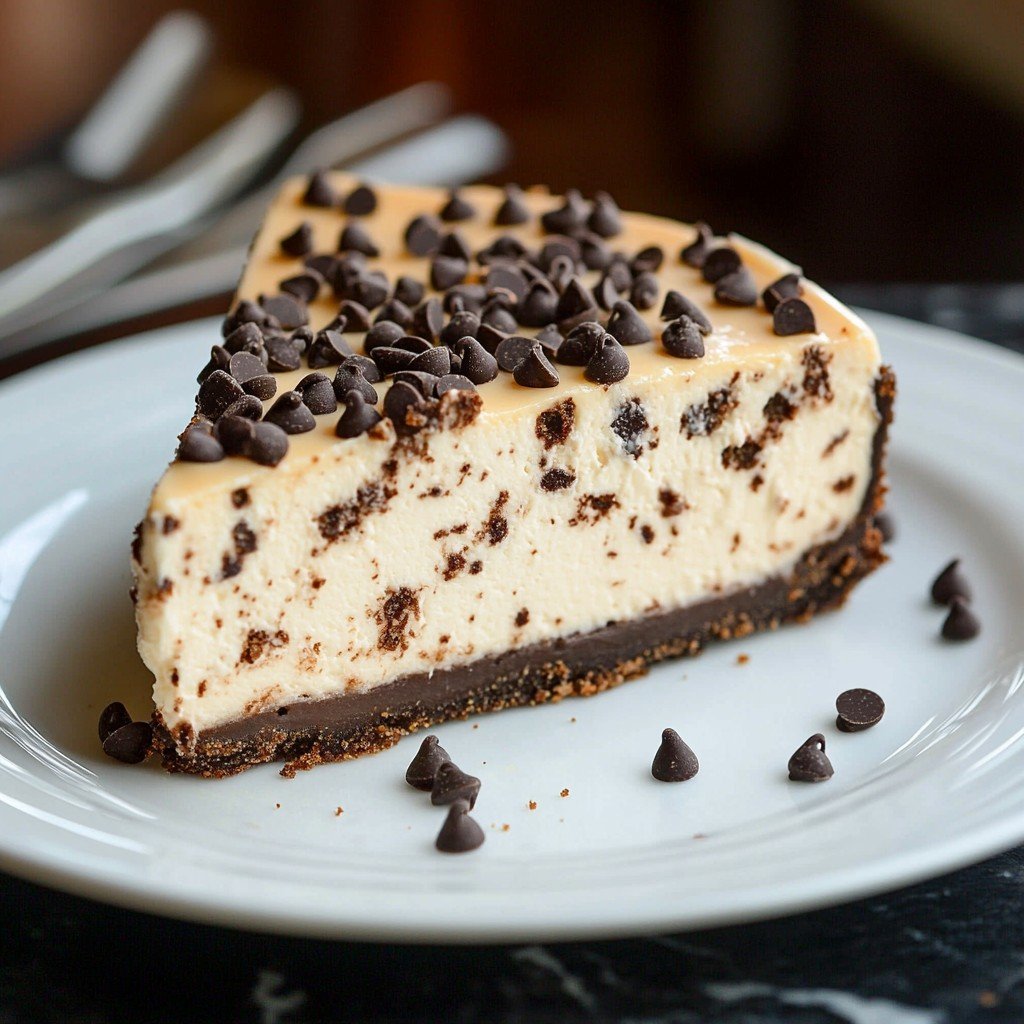
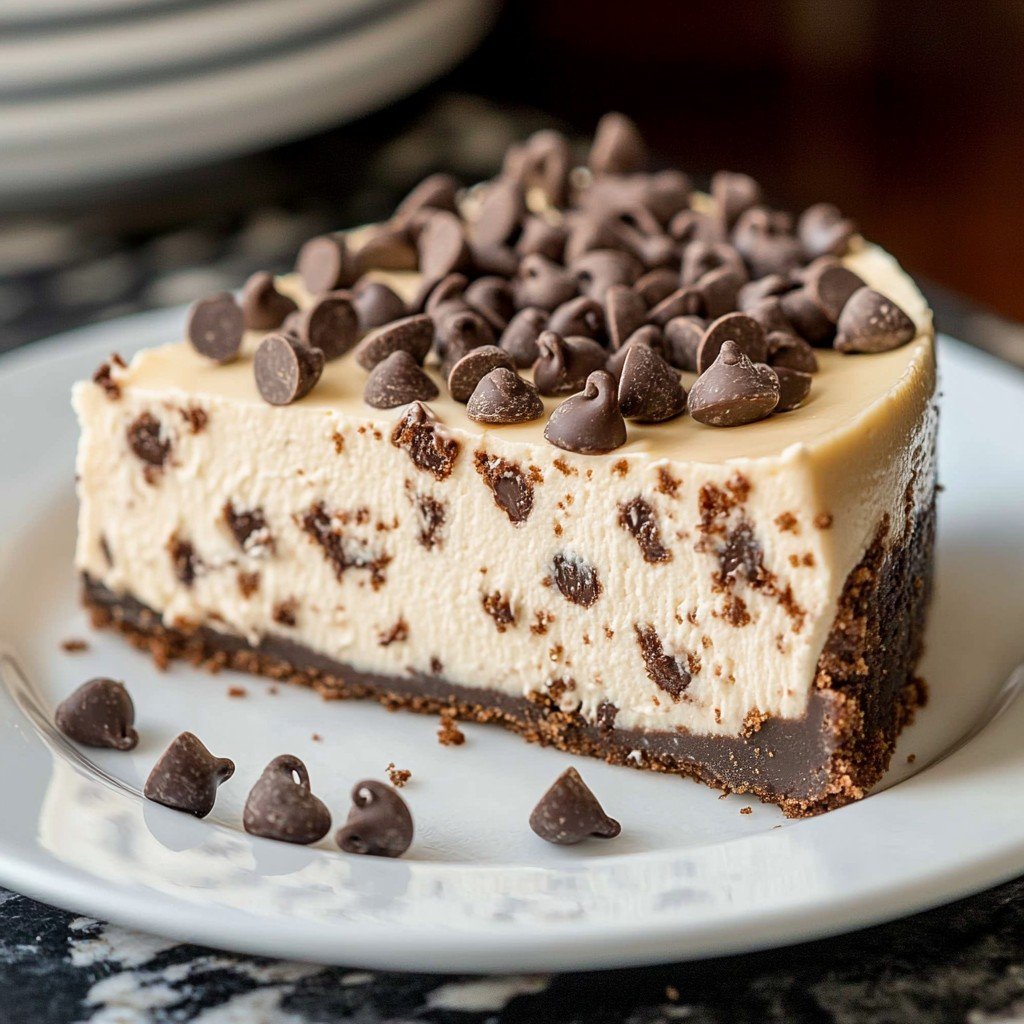
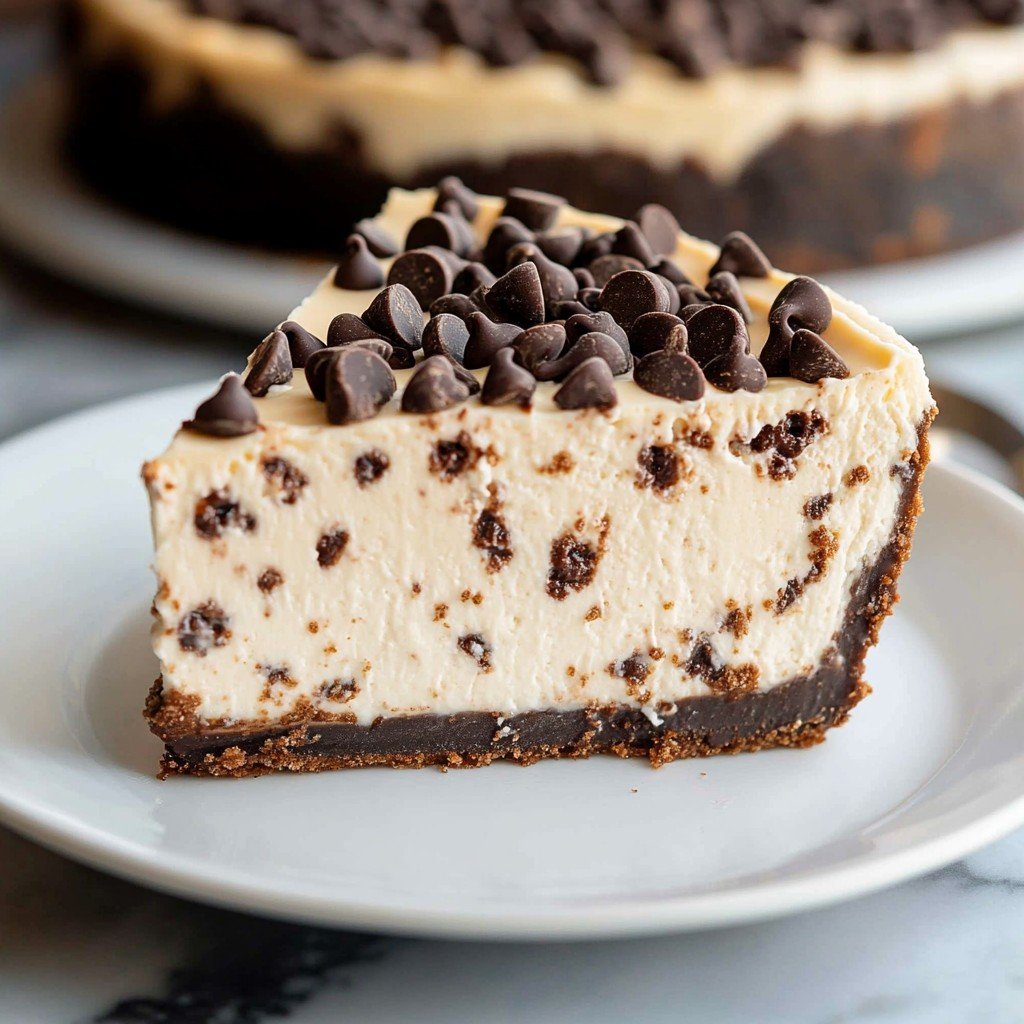
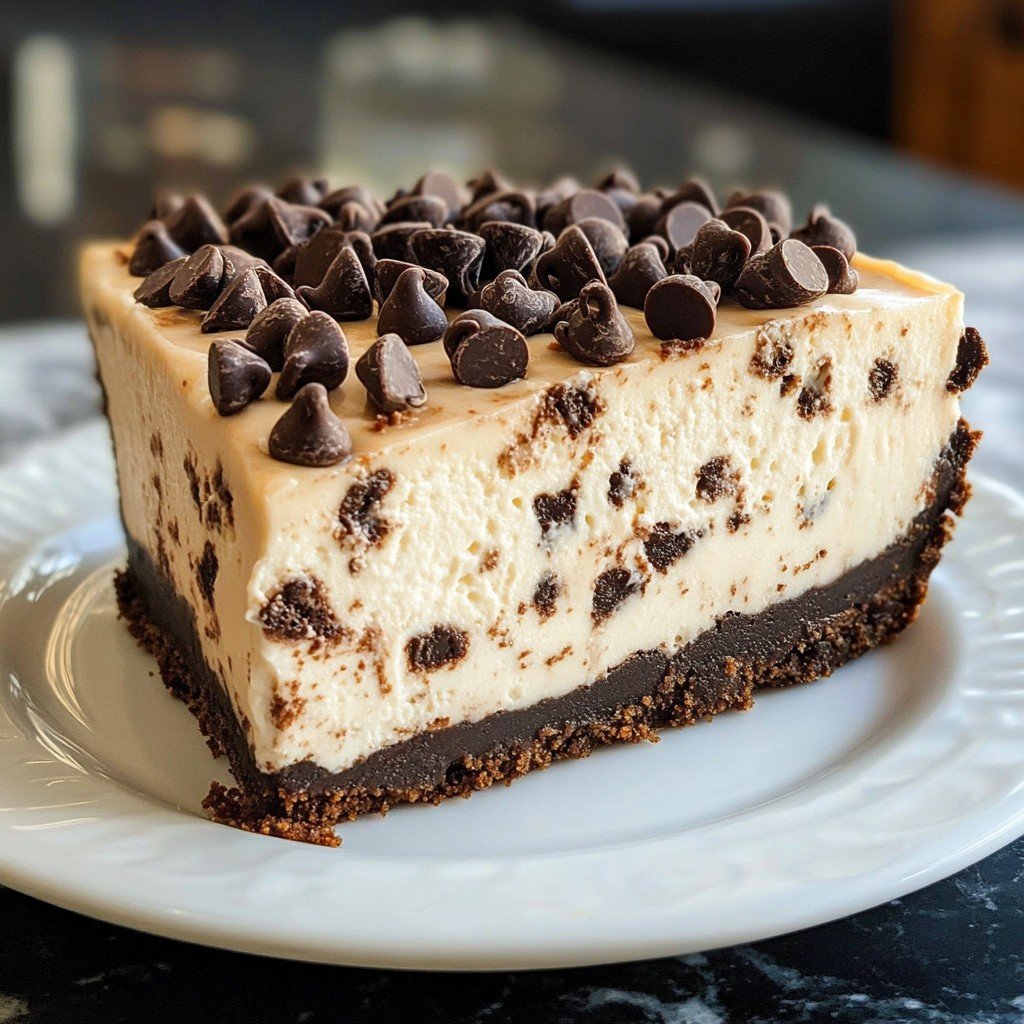
Protein Cheesecake is revolutionizing the way you indulge in dessert, combining the classic, creamy taste of cheesecake with the benefits of extra protein. Traditionally, cheesecake is a beloved dessert that dates back to ancient Greece, enjoyed for its soft, rich texture and sweet flavor.
However, as fitness and wellness have taken center stage in recent years, high-protein alternatives like Protein Cheesecake have become increasingly popular. Fitness communities and health-conscious individuals are seeking new ways to enjoy their favorite treats without compromising nutritional goals, making Protein Cheesecake an ideal solution.
Instead of sticking to the traditional heavy-cream base, this innovative cheesecake recipe incorporates protein-rich ingredients such as Greek yogurt, low-fat cream cheese, and protein powder.
This not only enhances the dessert’s creamy consistency but also significantly increases its protein content, making it perfect for post-workout recovery snacks or satisfying midday cravings.
Whether you’re looking to boost your daily protein intake, maintain a healthy lifestyle, or simply enjoy a guilt-free treat, Protein Cheesecake fits seamlessly into a variety of diets and preferences. This version of Protein Cheesecake is also customizable, allowing you to adapt flavors, textures, and toppings to your liking.
With this detailed recipe, you’ll discover just how easy, nutritious, and delicious a high-protein cheesecake can be—bringing you the best of both worlds: indulgence and nutrition.
Ingredients
- 200 grams low-fat cream cheese, softened
- 200 grams plain non-fat Greek yogurt
- 2 large eggs
- 1 scoop (about 30 grams) vanilla whey protein powder
- 1/4 cup granulated erythritol or stevia (or preferred sweetener)
- 1 teaspoon pure vanilla extract
- 1/2 teaspoon lemon zest (optional for brightness)
- Pinch of salt
- For the crust: 1/2 cup almond flour
- 2 tablespoons coconut oil, melted
- 1 tablespoon honey or sugar-free syrup
Instructions
- Preheat your oven to 325°F (163°C) and line a 7- or 8-inch springform pan with parchment paper.
- Mix the almond flour, melted coconut oil, and honey (or syrup) together until it forms a sandy consistency. Press this mixture evenly into the bottom of the prepared pan to create the crust.
- Bake the crust for 8-10 minutes, until lightly golden. Remove from the oven and let cool while you prepare the filling.
- In a large bowl, beat the cream cheese and Greek yogurt together until smooth and fluffy, ensuring there are no lumps.
- Add the eggs, one at a time, mixing well after each addition.
- Stir in the vanilla protein powder, sweetener, vanilla extract, lemon zest (if using), and a pinch of salt. Mix until fully combined and the batter is silky.
- Pour the cheesecake filling over the cooled crust and spread evenly with a spatula.
- Tap the pan lightly on the counter to release any air bubbles in the batter.
- Place the springform pan into a larger roasting pan and fill the roasting pan with hot water halfway up the sides (for a gentle bake and to avoid cracks).
- Bake for 35-40 minutes or until the center is just set and the edges start to pull away from the pan.
- Turn off the oven, crack the door, and allow the cheesecake to cool in the oven for 30 minutes.
- Transfer to a wire rack and let it cool to room temperature. Refrigerate for at least 4 hours, preferably overnight, before slicing and serving.
Nutritional Information
Protein Cheesecake is not only indulgent but also incredibly nutritious compared to traditional cheesecakes. Each serving (assuming 8 slices per cake) contains approximately 180-220 calories, depending on the ingredients and protein powder variety you use.
The key highlight is the high protein content—typically ranging from 14 to 18 grams per serving—making it ideal for muscle recovery, satiety, and supporting overall metabolism.
Fat content is notably reduced by incorporating low-fat cream cheese and Greek yogurt, while the use of almond flour in the crust increases fiber and healthy fats, offering better heart health benefits. The carbohydrates are moderate and can be further lowered by using low-calorie sweeteners like erythritol or stevia.
Additionally, the combination of calcium-rich dairy and egg protein supports bone and muscle health. By avoiding processed sugars and heavy cream, Protein Cheesecake keeps cholesterol and saturated fats minimal.
This dessert is suitable for those following a balanced diet, weight management plan, or a fitness-oriented lifestyle, offering a sweet reward without derailing nutritional goals.
Wine and Beverage Pairings
When serving Protein Cheesecake, the right beverage pairing can elevate the tasting experience. For those who enjoy a sophisticated dessert-time beverage, a glass of dry sparkling wine, like Brut Champagne, offers a delightful contrast to the cheesecake's creamy richness while cleansing the palate.
If you prefer non-alcoholic options, a freshly brewed cup of espresso or strong black coffee complements the sweetness and protein flavors superbly. Herbal teas, such as chamomile or peppermint, bring soothing notes and balance out the cake's richness.
For a fun and nutritious twist, serve your Protein Cheesecake alongside a protein shake or a cold glass of almond milk to reinforce the high-protein theme.
Cooking Tips and Variations
Making Protein Cheesecake is both science and art, and a few tricks ensure the best possible outcome. For a smooth, lump-free filling, always use room-temperature cream cheese and eggs.
Overmixing can introduce air, which might cause the cake to crack or rise unevenly, so mix just until the ingredients are combined.
Baking the cheesecake in a water bath (placing the pan in a larger roasting pan with hot water) is crucial for an evenly cooked, creamy texture and helps prevent unsightly cracks.
If you prefer a crustless version, skip the almond flour crust altogether—this will lower the calorie and carb counts even more.
You can also experiment with flavors by adding cocoa powder for a chocolate protein cheesecake, mixing in your favorite fruit puree, or switching protein powder flavors (like strawberry, chocolate, or unflavored).
For a dairy-free version, use dairy-free cream cheese, coconut-based yogurt, and plant-based protein powder to cater to vegan or lactose-intolerant guests. For added crunch and texture, sprinkle slivered almonds or chopped walnuts on the crust before baking.
Remember to let your cheesecake rest in the fridge for several hours, or overnight, for the best flavor and structure—freshly baked cheesecakes are notoriously delicate until fully set.
Serving Suggestions
Presentation is key when serving Protein Cheesecake, making the experience feel special whether it’s a casual family meal or an elegant gathering. Slice the chilled cheesecake with a sharp, wet knife for pristine cuts and wipe the blade clean between slices to maintain a flawless appearance.
Garnish each slice with seasonal fresh berries—such as raspberries, strawberries, or blueberries—to add natural sweetness, color, and an antioxidant boost. For extra flair, swirl a low-sugar fruit compote or thin drizzle of melted dark chocolate on the plate before laying down each slice.
A sprinkle of crushed nuts or toasted coconut flakes can also enhance texture and provide visual appeal. Protein Cheesecake can also be portioned into individual mason jars or dessert glasses for stylish single-serve presentations at parties or meal prep.
Pair your cheesecake slices with a small scoop of protein ice cream or Greek yogurt for a decadent protein-packed dessert experience. Whether enjoyed plain or adorned with toppings, serve well-chilled for the firmest texture and freshest flavor.
Store leftovers in an airtight container in the refrigerator for up to five days, or freeze individual slices for a protein-rich treat ready at any time.
Health Benefits
Protein Cheesecake stands out among desserts as a nutritious way to satisfy sweet cravings without the guilt. Its high protein content, primarily from Greek yogurt, whey protein, and eggs, supports muscle growth, aids in post-workout recovery, and promotes a prolonged feeling of fullness—helping with appetite control and weight management.
Low-fat dairy components ensure that each serving is lower in saturated fat and calories than traditional cheesecakes, making it suitable for heart-healthy diets. Using almond flour in place of processed wheat flour keeps the recipe gluten-free, offers a boost of fiber and micronutrients like vitamin E, and supports digestive health.
Natural, low-calorie sweeteners like erythritol or stevia keep blood sugar impact minimal, making Protein Cheesecake a smart dessert for anyone seeking to manage glucose levels, including diabetics.
Additionally, dairy and eggs contribute calcium, vitamin D, and B vitamins, all of which are vital for immune function, energy metabolism, and bone strength. Ultimately, Protein Cheesecake is a dessert that fits seamlessly into many wellness routines, balancing taste and nutrition.
Frequently Asked Questions
Yes, you can omit the protein powder, but the total protein content per slice will be lower. To maintain a rich texture, consider adding an extra spoonful of Greek yogurt or low-fat cottage cheese.
Use room-temperature ingredients, mix the batter just until combined, and always bake your cheesecake in a water bath. Allow it to cool slowly in the oven before transferring to the fridge for best results.
Absolutely! The recipe uses almond flour for the crust, which is naturally gluten-free. Ensure all other ingredients you use are certified gluten-free if required.
Protein Cheesecake stays fresh and delicious for up to five days in an airtight container in the refrigerator. For longer storage, freeze individual slices for up to two months.
Yes, you can substitute dairy-free cream cheese and yogurt alternatives, and use a plant-based protein powder. The texture and flavor will remain delicious.
Protein Cheesecake is a delicious fusion of classic dessert flavors and modern nutritional benefits. With its high protein content, reduced fat, and customizable ingredients, this cheesecake is perfect for anyone looking to indulge smartly. Whether for a post-workout treat, meal prep dessert, or a healthy celebration centerpiece, Protein Cheesecake delivers both taste and wellness in every bite. With the right tips, variations, and mindful ingredient choices, you can easily enjoy this creamy, satisfying dessert while staying aligned with your health and fitness goals. Treat yourself and your loved ones to this balanced, protein-packed delight, and savor dessert without compromise.
Ingredients
- 200 grams low-fat cream cheese, softened
- 200 grams plain non-fat Greek yogurt
- 2 large eggs
- 1 scoop (about 30 grams) vanilla whey protein powder
- 1/4 cup granulated erythritol or stevia (or preferred sweetener)
- 1 teaspoon pure vanilla extract
- 1/2 teaspoon lemon zest (optional for brightness)
- Pinch of salt
- For the crust: 1/2 cup almond flour
- 2 tablespoons coconut oil, melted
- 1 tablespoon honey or sugar-free syrup
Instructions
-
1Preheat your oven to 325°F (163°C) and line a 7- or 8-inch springform pan with parchment paper.
-
2Mix the almond flour, melted coconut oil, and honey (or syrup) together until it forms a sandy consistency. Press this mixture evenly into the bottom of the prepared pan to create the crust.
-
3Bake the crust for 8-10 minutes, until lightly golden. Remove from the oven and let cool while you prepare the filling.
-
4In a large bowl, beat the cream cheese and Greek yogurt together until smooth and fluffy, ensuring there are no lumps.
-
5Add the eggs, one at a time, mixing well after each addition.
-
6Stir in the vanilla protein powder, sweetener, vanilla extract, lemon zest (if using), and a pinch of salt. Mix until fully combined and the batter is silky.
-
7Pour the cheesecake filling over the cooled crust and spread evenly with a spatula.
-
8Tap the pan lightly on the counter to release any air bubbles in the batter.
-
9Place the springform pan into a larger roasting pan and fill the roasting pan with hot water halfway up the sides (for a gentle bake and to avoid cracks).
-
10Bake for 35-40 minutes or until the center is just set and the edges start to pull away from the pan.
-
11Turn off the oven, crack the door, and allow the cheesecake to cool in the oven for 30 minutes.
-
12Transfer to a wire rack and let it cool to room temperature. Refrigerate for at least 4 hours, preferably overnight, before slicing and serving.
Approximate Information for One Serving
Nutrition Disclaimers
Number of total servings shown is approximate. Actual number of servings will depend on your preferred portion sizes.
Nutritional values shown are general guidelines and reflect information for 1 serving using the ingredients listed, not including any optional ingredients. Actual macros may vary slightly depending on specific brands and types of ingredients used.
To determine the weight of one serving, prepare the recipe as instructed. Weigh the finished recipe, then divide the weight of the finished recipe (not including the weight of the container the food is in) by the desired number of servings. Result will be the weight of one serving.
Did you make this recipe?
Please consider Pinning it!